Look at the following imges, Autel MaxiPRO MP808 failed to set gmail.
Autel engineer replied:
Set it on the official website of the Gmail mailbox first, and then set it on the device. Please follow the following procedure step by step. The insrtuction guide those who are unable to set up the mail box for Autel diagnostic tools including Autel MaxiSys, Maxicom, MaxiDAS, MaxiPro, MaxiIM IM508 / IM608 etc.
Step 1: Log into your Gmail on PC/laptop and click the setting icon.

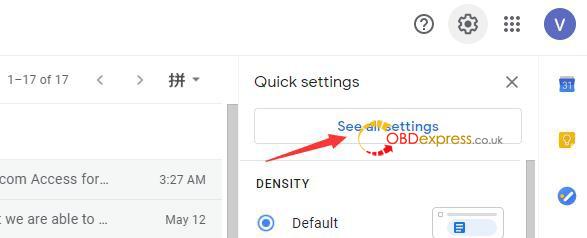
Step 2: Click “See all settings”
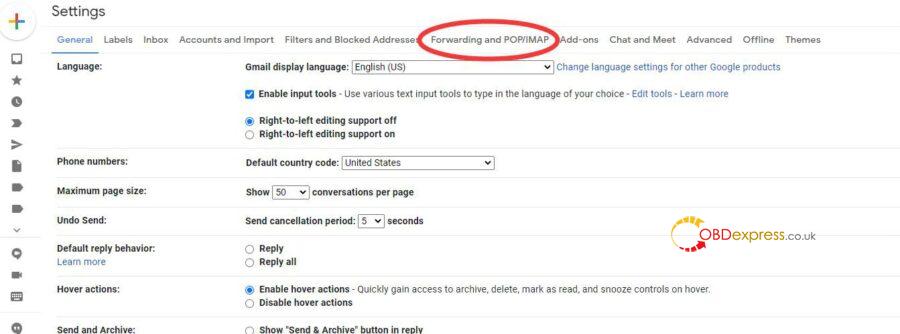
Step 3: Click “Forwarding and POP/IMAP”
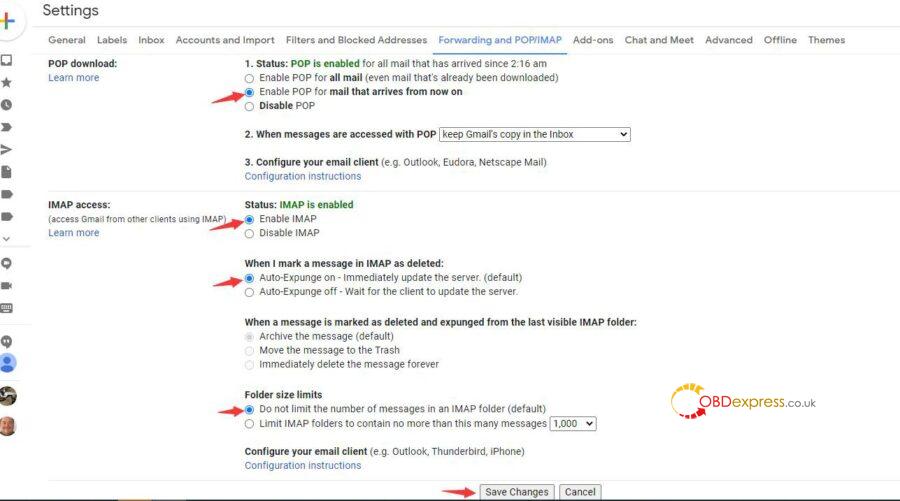
Step 4: Enable POP and IMAP and save changes.
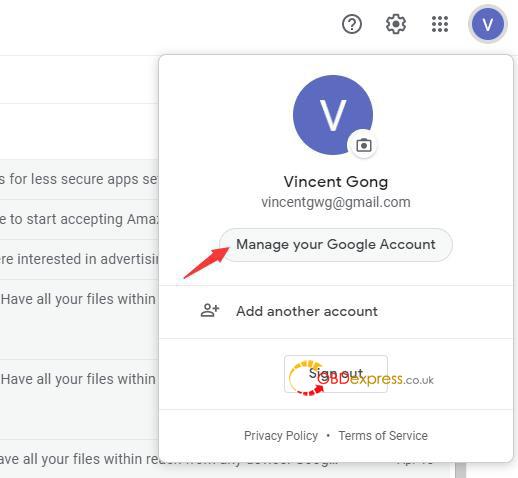
Step 5: Click “Manage your Google Account”
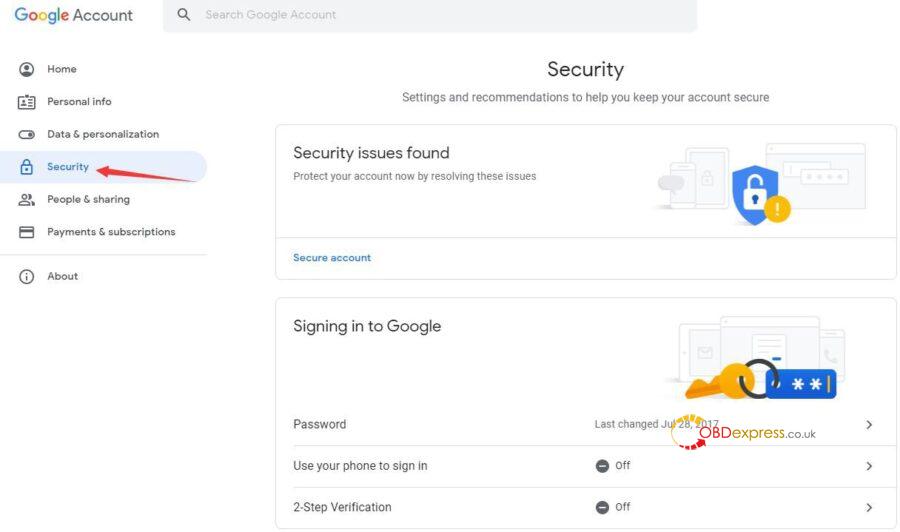
Step 6: Click “Security”
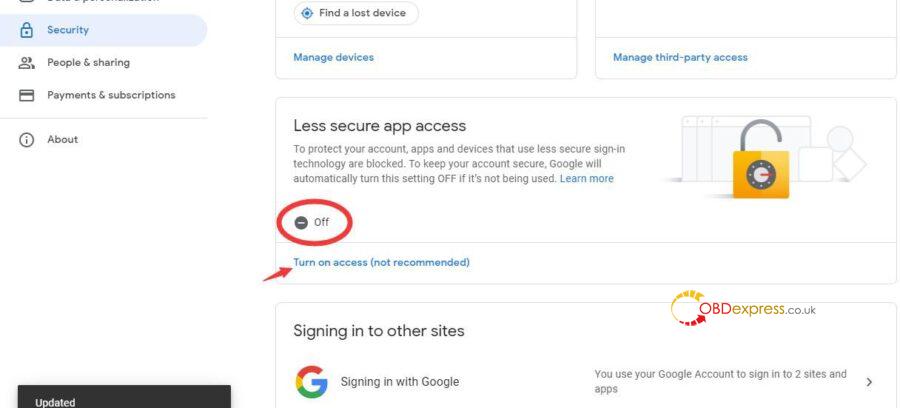
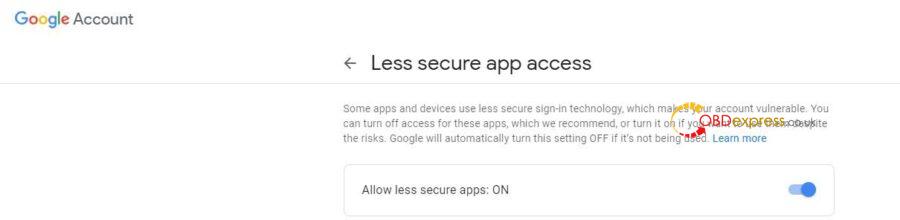
Step 7: Turn on “Less secure app access”
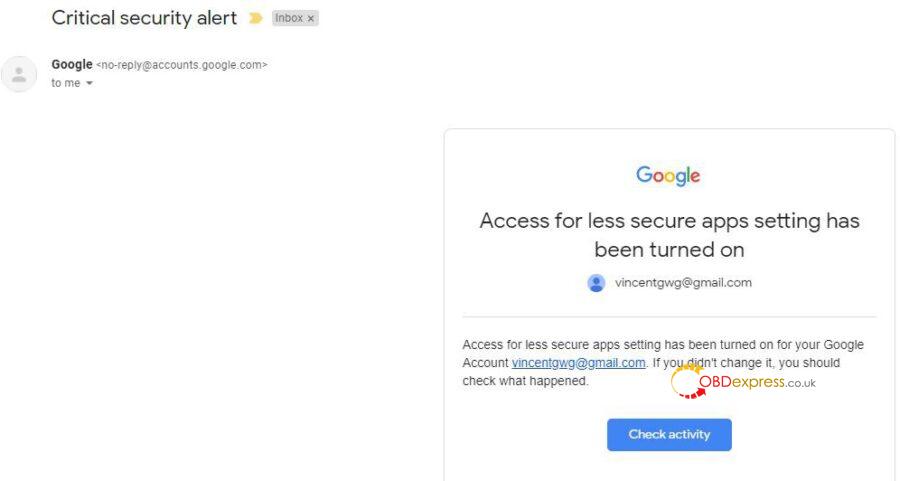
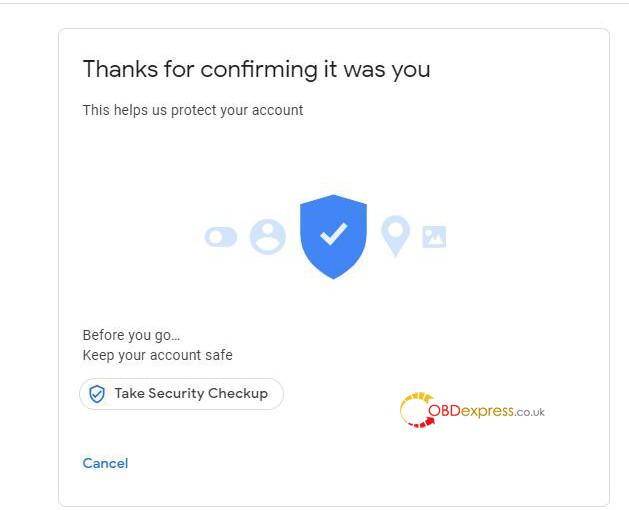
Step 8: Go back to your Gmail inbox and check the Google alert email and confirm the activity.

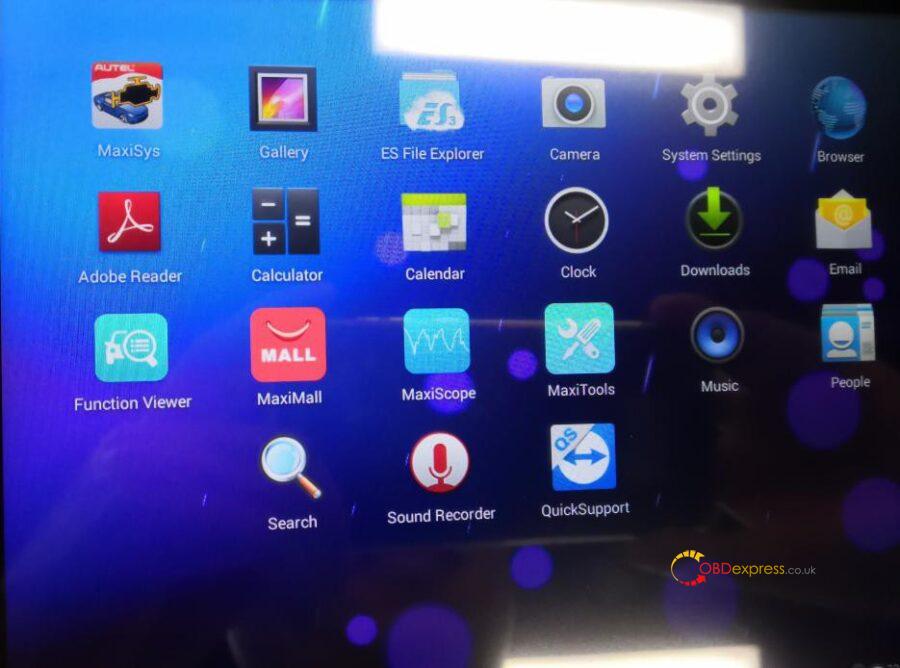
Step 9: Go to the home page of the Autel scan tool and click “System Settings”
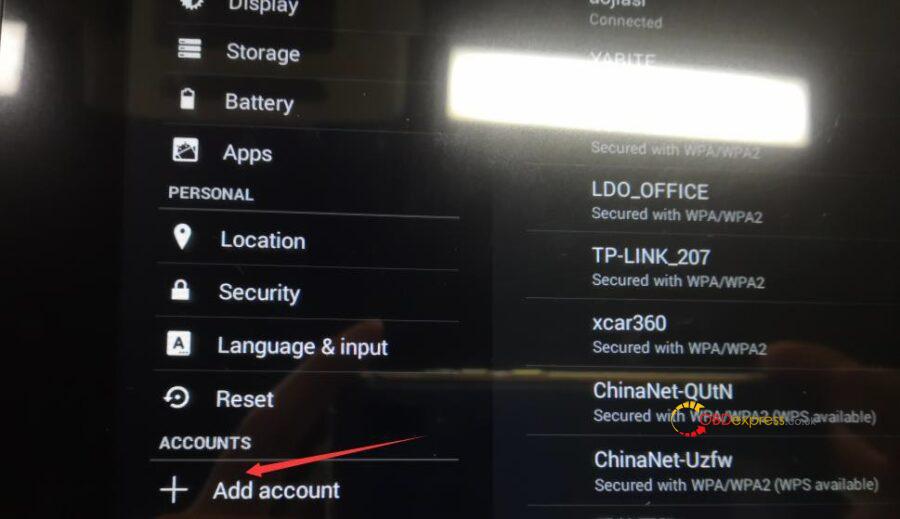
Step 10: Click “Add account
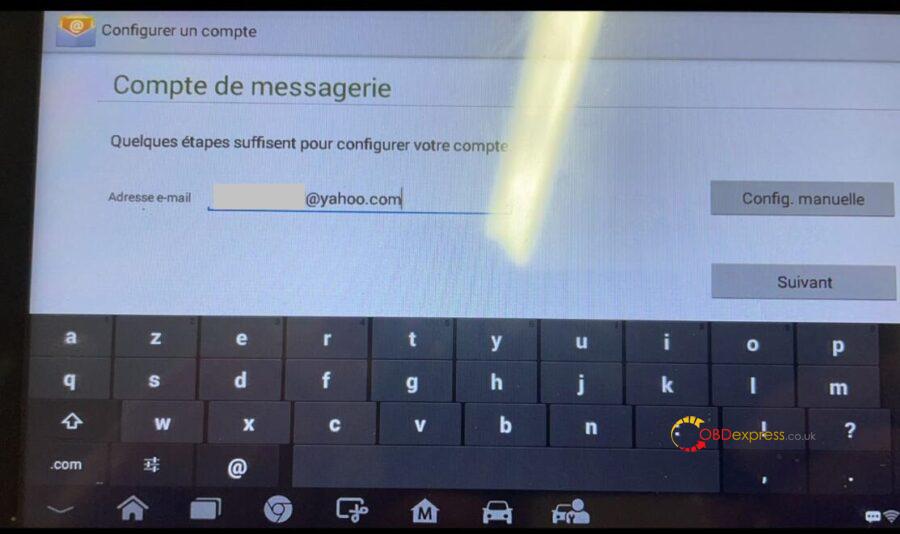
Step 11: Input your Gmail address, password and click next.

Step 11 Or input your Gmail email address, password, and click “Manual Setup”.
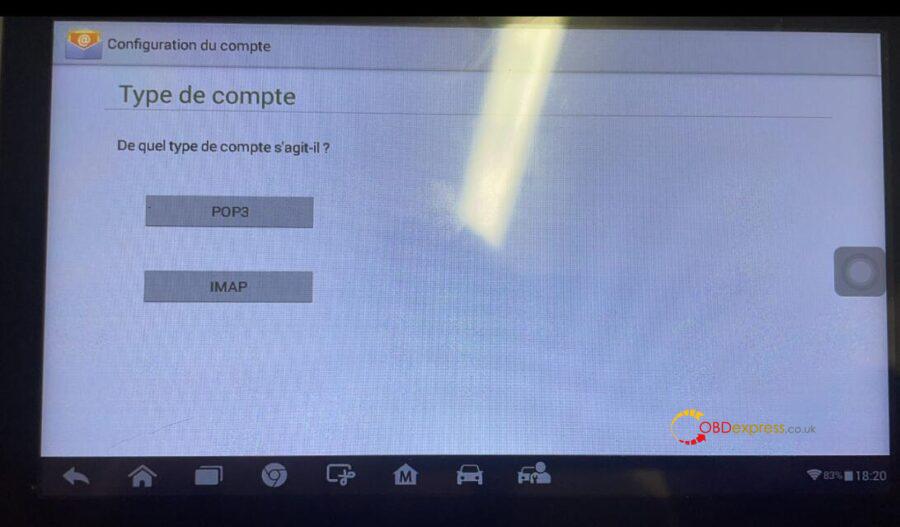
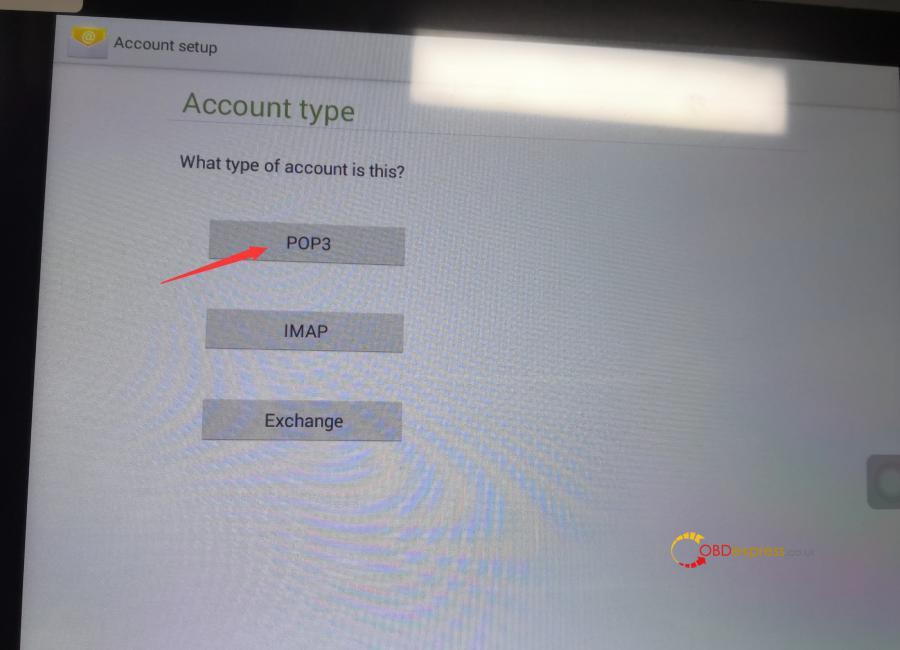
Step 12: Click “POP3
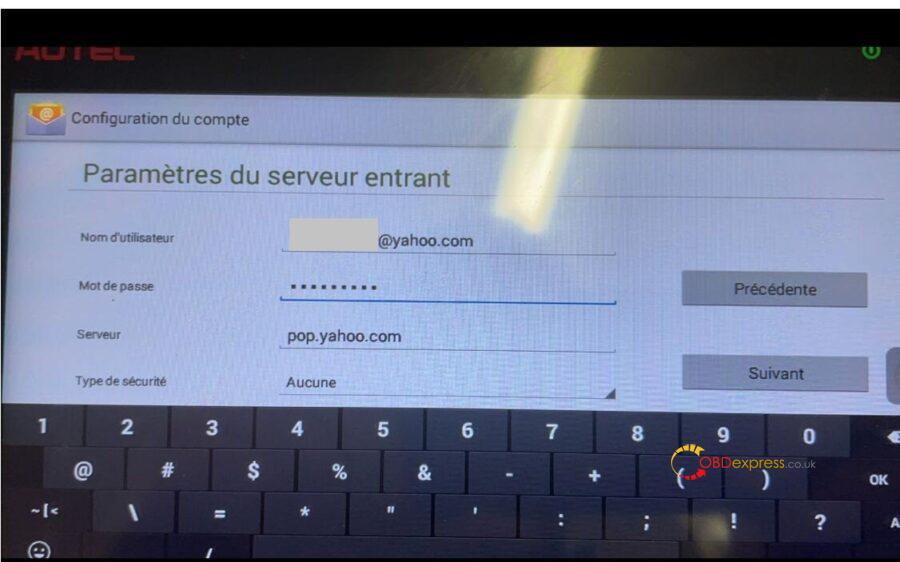
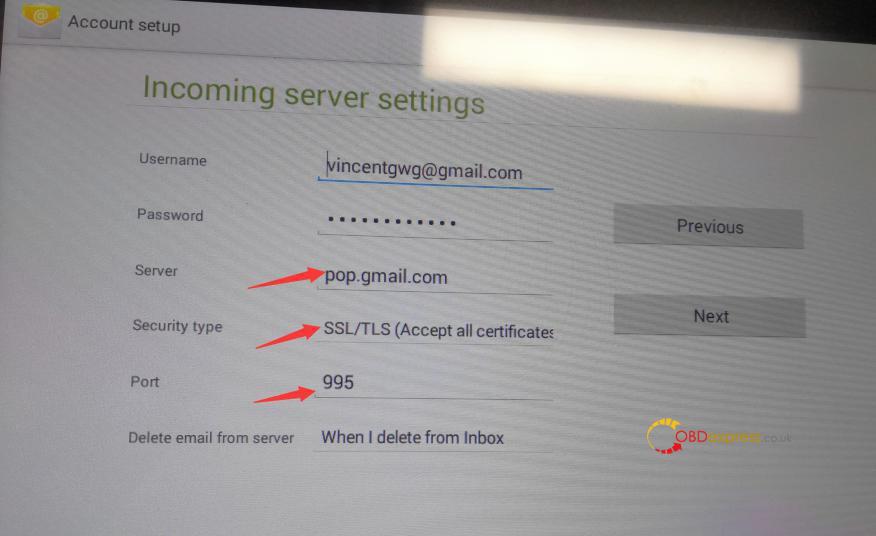
Step 13: Set the Incoming server settings as below:
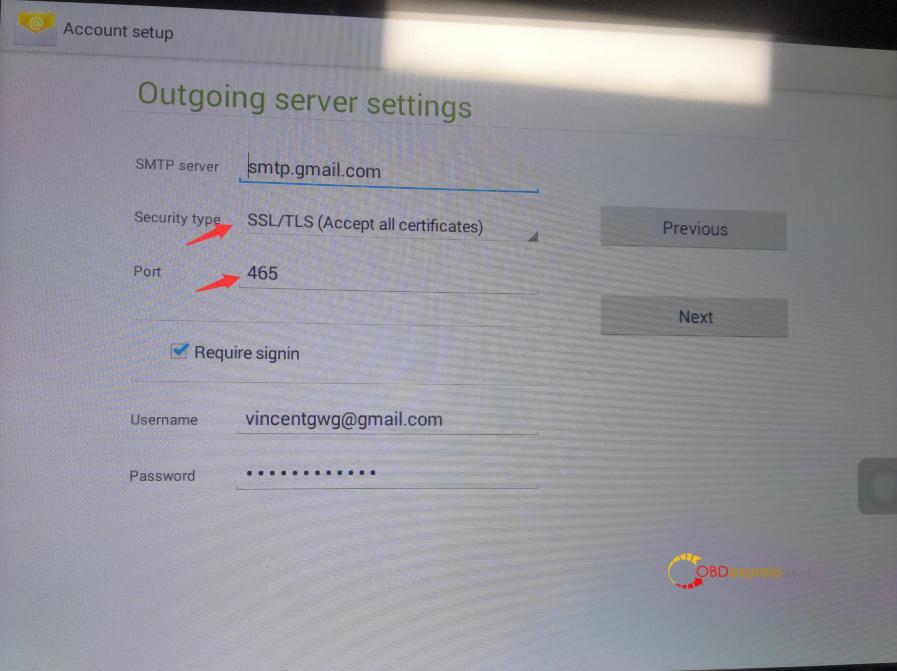
Step 14: Set the Outgoing server as below:
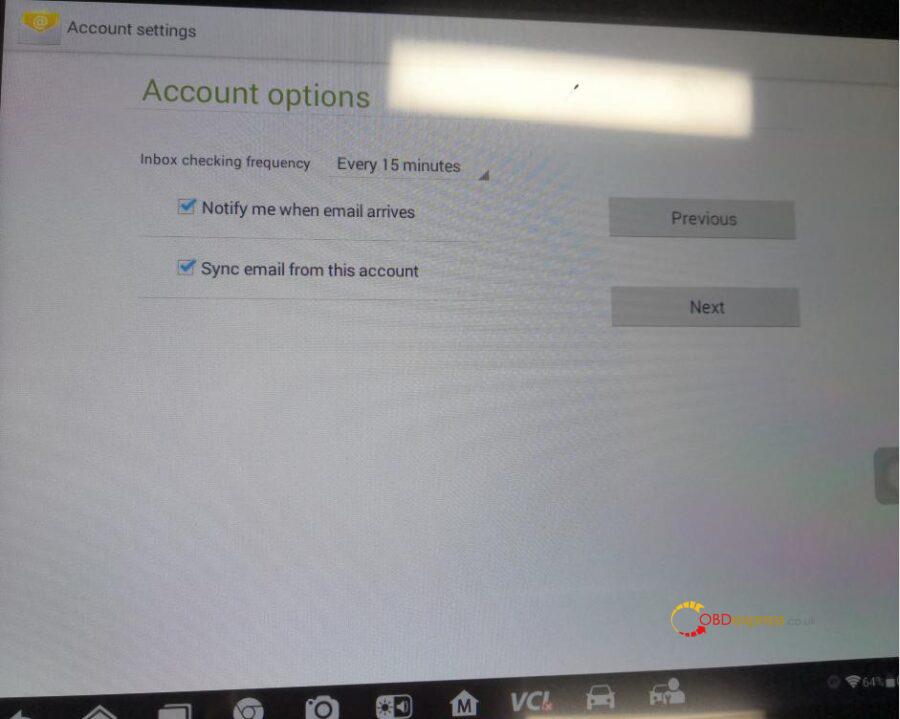
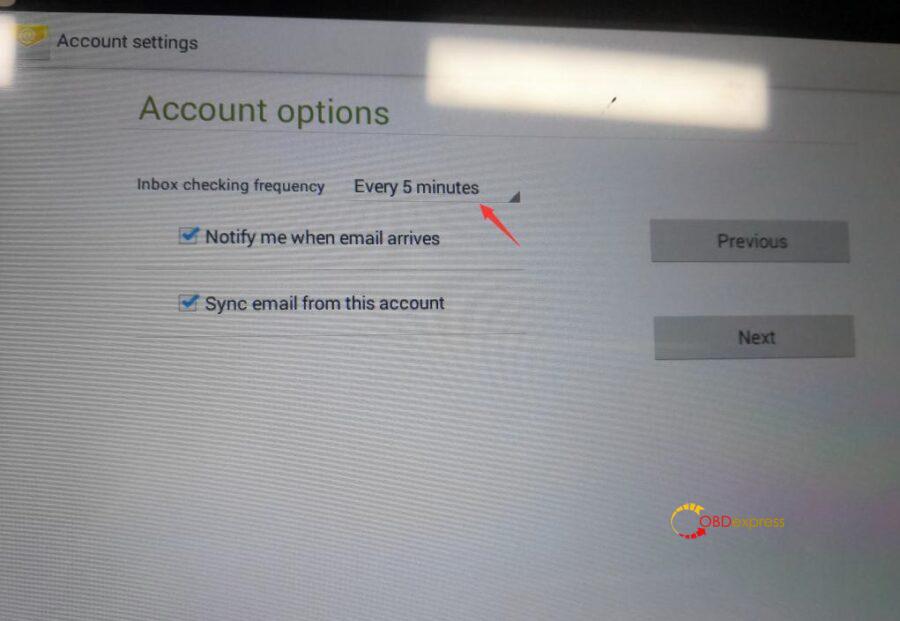
Step 15: Set Inbox Checking frequency as “Every 5 minutes”
Step 16: Input your Name for your account.

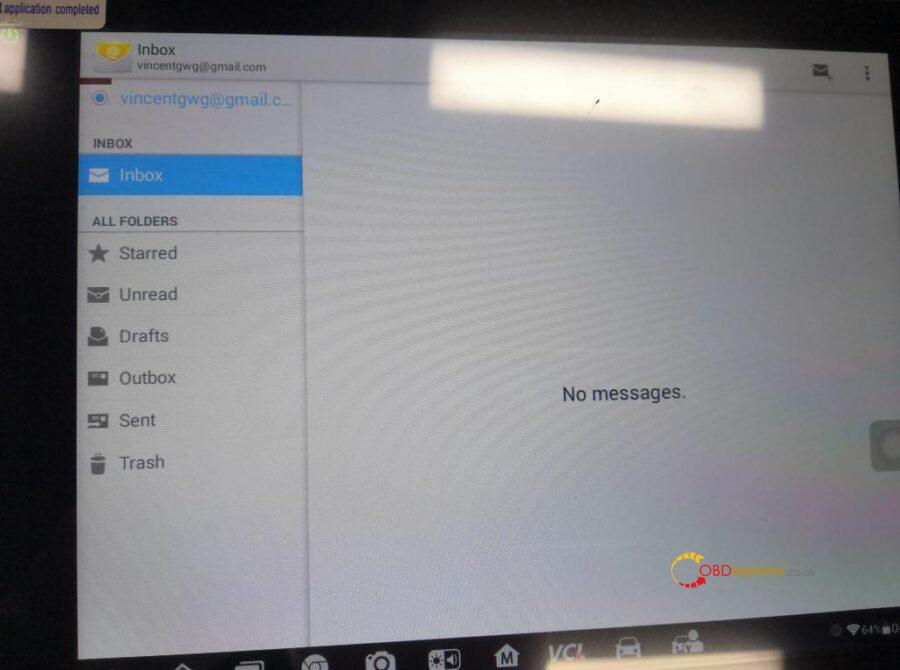
Step 17: Email account was set up successfully!
NOTE: Please reboot the Autel scan tool and reset the wifi connection when it shows “Couldn’t open connection to server” error. Sometimes the server does not respond, please keep trying.

Hope it helps!
Technical support for this article: obdexpress.co.uk
Look at the following imges, Autel MaxiPRO MP808 failed to set gmail.
Autel engineer replied:
Set it on the official website of the Gmail mailbox first, and then set it on the device. Please follow the following procedure step by step. The insrtuction guide those who are unable to set up the mail box for Autel diagnostic tools including Autel MaxiSys, Maxicom, MaxiDAS, MaxiPro, MaxiIM IM508 / IM608 etc.
Step 1: Log into your Gmail on PC/laptop and click the setting icon.
Step 2: Click “See all settings”
Step 3: Click “Forwarding and POP/IMAP”
Step 4: Enable POP and IMAP and save changes.
Step 5: Click “Manage your Google Account”
Step 6: Click “Security”
Step 7: Turn on “Less secure app access”
Step 8: Go back to your Gmail inbox and check the Google alert email and confirm the activity.
Step 9: Go to the home page of the Autel scan tool and click “System Settings”
Step 10: Click “Add account
Step 11: Input your Gmail address, password and click next.
Step 11 Or input your Gmail email address, password, and click “Manual Setup”.
Step 12: Click “POP3
Step 13: Set the Incoming server settings as below:
Step 14: Set the Outgoing server as below:
Step 15: Set Inbox Checking frequency as “Every 5 minutes”
Step 16: Input your Name for your account.
Step 17: Email account was set up successfully!
NOTE: Please reboot the Autel scan tool and reset the wifi connection when it shows “Couldn’t open connection to server” error. Sometimes the server does not respond, please keep trying.
Hope it helps!
Technical support for this article: obdexpress.co.uk