digimasteriii-update-instruction.pdf (536K)
how-to-adjust-mileage-with-digimaster3.pdf (944K) digimasteriii-english-user-instruction.pdf (3.4M)
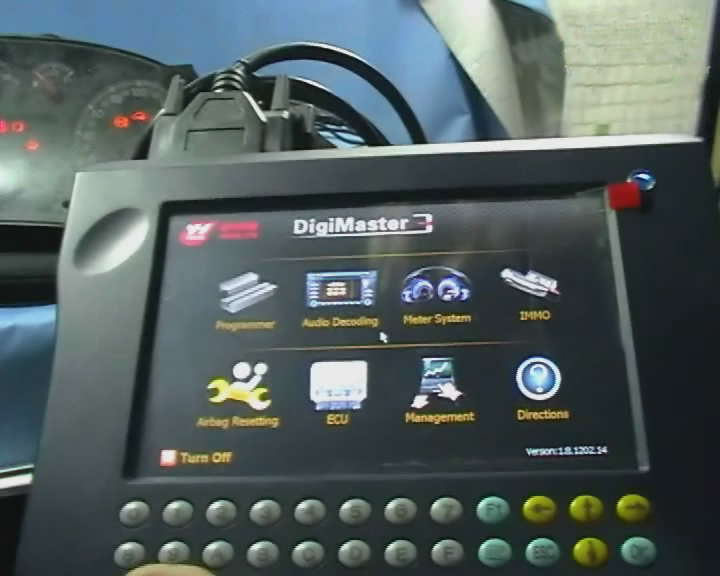
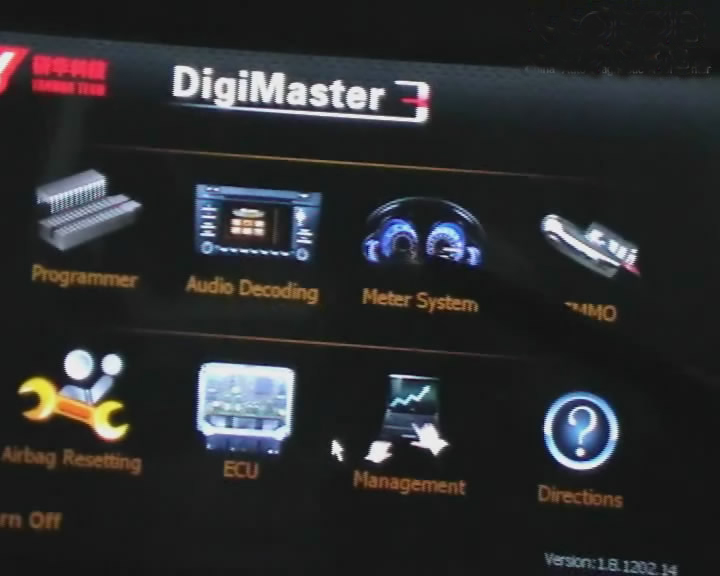
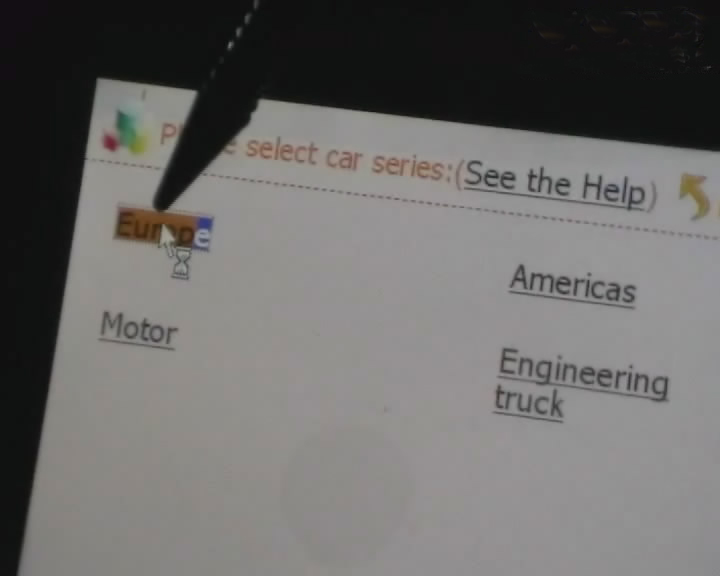
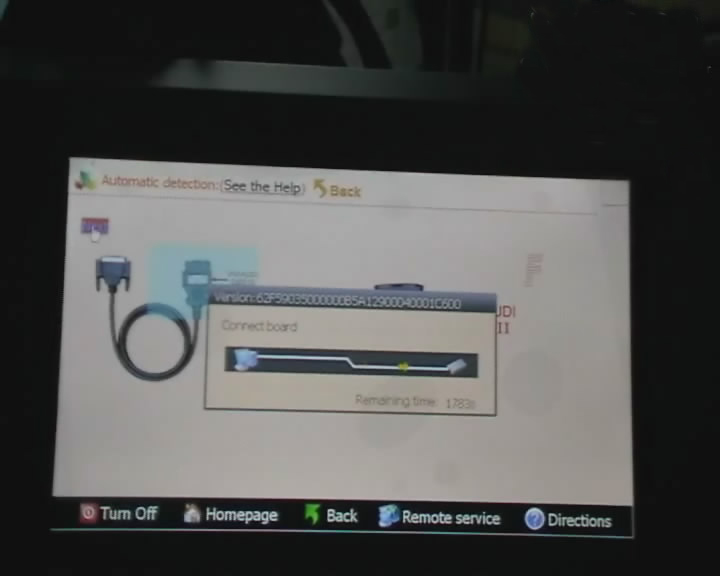
How to operate Digimaster 3 ?
1. digimaster 3 function menu
Digimaster 3 update kernel
After update EBOOT, it is necessary to update kernel.
Tips: Before update EBOOT, please instal D3 TOOL first.
Step 1: Press button number 8 and button OK at the same time, and turn the power on. When you see “Press OK to confirm and continue update Firmware” press OK, then it enter the procedure of updating.
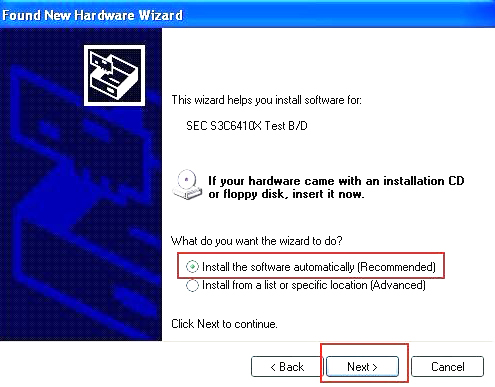
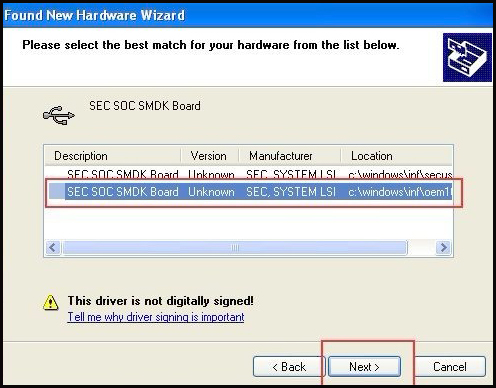
Step 2: Connect D3 with a computer through Mini USB (purple color), you can see a tip "Found New Hardware wizard".As the image shown below.


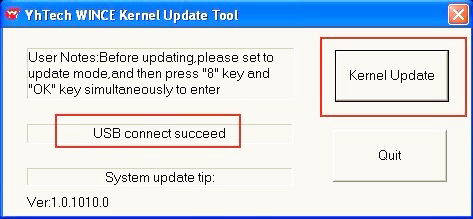
Step 7: click "Kernel Update" and choose "EBOOT_20110427.bin" then click "OK" to start EBOOT program update.
Step 8: After 10sec. the DIGIMASTER 3 screen appears a twinkling red 'YH' logo which means EBOOT update is complete.
After update EBOOT successfully, please turn the power off and choose a appropriate way to update the kernel.
TIPS: Please uninstall the anti-virus software and firewall temporarily in order to run the software normally.
After Update EBOOT, still not work?
Second way, please operate by following the next tips:
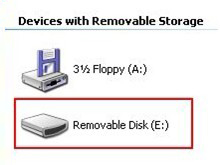
1.Remove SD card from D3 to cardreader,and connect to PC. After successful connection, click "Removable Disk(E:)" as showed in the picture.
2. Delete the old file "YHTech" which is inSD card.
3. Copy the "YHTech" files from CD, and save it in SD card.
4. Please insert SDcard into D3 after successfully copy and paste. Then connect to network andturn on D3, click "OK" for downloading when appear remark of "Pleaseconnect network download hypervisors!" in the interface. It can befunctioned after successful download.”
Note:
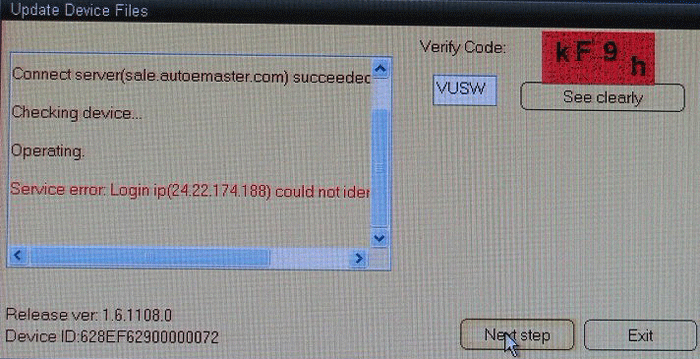
1) When you use digimaster3 ck1200, if the following error appears, this is IP restriction,
please tell us, we will help you remove restriction according to IP.
2) The following digimaster3 BMW adapter has not been concluded:

Now it is replaced by this one:

3) Digimaster 3 English version doesn't have TMS370 Programmer adpater, only Chinese version has.

via the Yanhua official site: http:/iccdp.com/
Click on “Download” and find out the correct software used with digimaster 3
Digimaster 3 operation system:
Windows XP (except version 2002);
Windows 7 32 or 64 bit
Windows 10 (need luck)
For Digimaster 3 Windows 10:
you have to set up something first when you finish Digimaster 3 software installation:
run Digimaster 3 properties and go to compatibilities and tick on run as admin
you’re advised to use Windows 7 without anti-virus application! The path cannot be changed and the app must be saved in the disk C: (if you install it in other disks, you will fail to open the app for use; if you have changed the path, please uninstall and install it again.)
Tip: cannot run Digimaster 3 on Windows 7 system
A8: go to Digimaster 3 properties->compatibilities->run as admin->ok->update
Tip: How to connect Digimaster 3 to a laptop/computer and how search data saved (that is read out by Digimaster 3)
A11: you can take out the SD card from Digimaster 3 machine and put it into a car reader to connect to a laptop to get data read out; also, you can connect Digimaster 3 directly to the laptop:
Windows XP:
go to the official site and download D3 TOOLS software;
connect D3 and the laptop using a mini USB cable;
connected successfully;
then you can read data in my computer->mobile device
Windows 7:
directly connect D3 and the laptop using a mini USB cable;
connected successfully;
pop up info from Windows Mobile device center and connection succeeds;
click on “not set up” and connect;
click on file management->NandFlash->YHTech->User
(if you want read data from the D3 SD card, firstly you should install Digimaster 3 and the like)
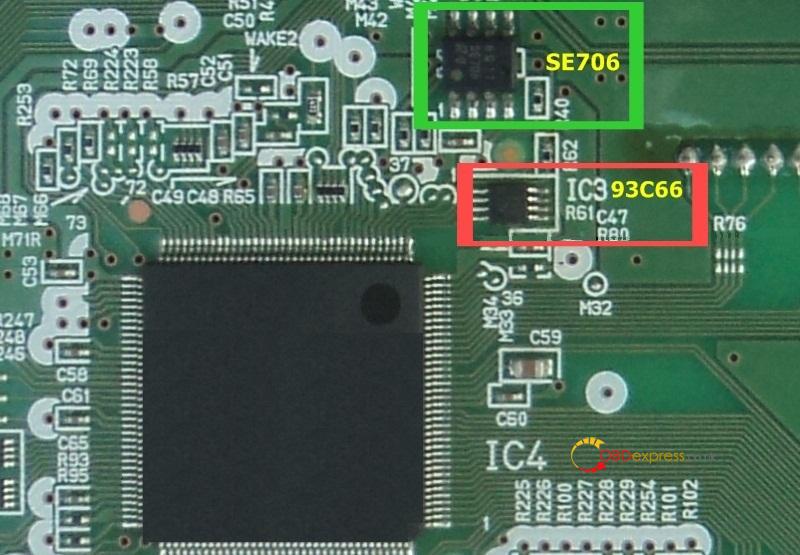
Yanhua Digimaster3 Toyota Viios 2015 MB91F047 Pinout
MCU Chip: Toyota Viios 2015 MB91F047
Device: Yanhua Digimaster3
Need: Correct Pinout
Purpose: Change ODO from 50k to 28k
In digimaster 3 no c66 I.C only 93C66 and 93LC66.
Digimaster3 Toyota Viios 2015 Mb91f047 Pinout 01Digimaster3 Toyota Viios 2015 Mb91f047 Pinout 02
Finally, Done Changing ODO by Removing c66 I.C and Write Millage data using Digimaster 3.
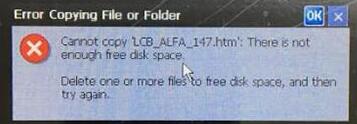
4.How to solve Digimaster 3 Error "Cannot copy “LCB_ALFA_147.htm”
Learn more:
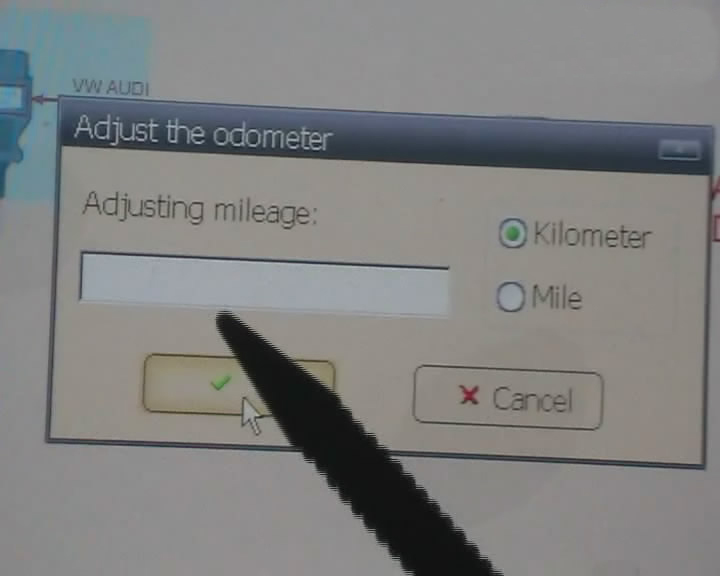
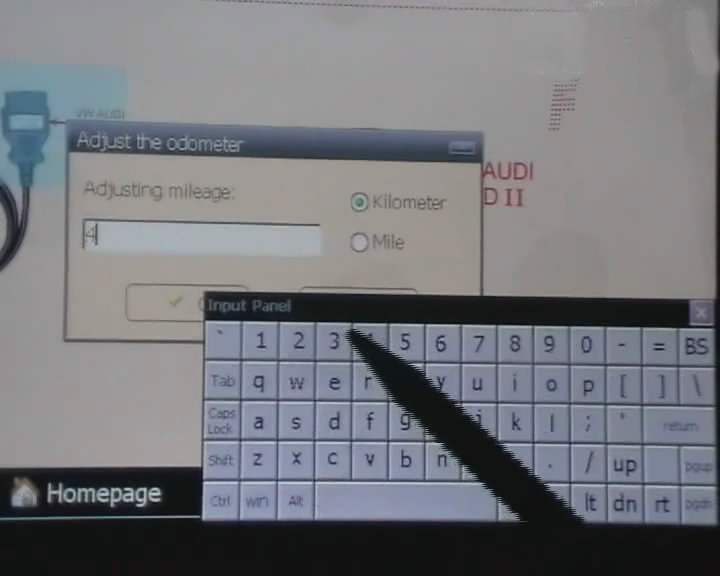
How Digimaster 3 Change Mileage For Ford Mondeo 1,6 SCTi 160 HK